


Introduction
A smart shopping app is a mobile program designed to enhance the shopping experience by supplying users with features like digital catalogs, customized guidelines, and payment alternatives.
Smart store apps are essential in the trendy retail landscape because they bridge the gap between online and offline shopping.
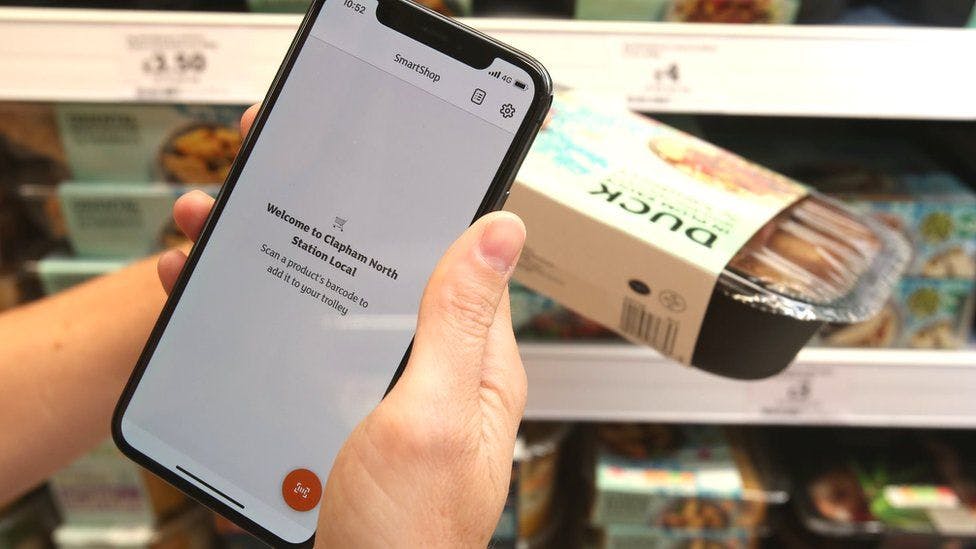
Imagine entering your favorite store, scanning every product you need, and paying for the goods via your smartphone. How cool is that!
This article offers a realistic and technical manual for developing a smart shop app.

What is a Smart Shop App
A smart shop app is a mobile application for enhancing in-store shopping. It offers a digital product catalog for easy browsing.
Users can log in, enabling personalized features and saved lists. A virtual shopping cart helps users keep track of their items.
Payment integration allows for easy, in-app purchases. Also, location services assist users in finding products and offers.
Some apps connect to in-store IoT devices for real-time data.
Security, user feedback, and personalized recommendations are key features.
Designing the Smart Shop App
Designing a smart shop app with Kotlin was a creative journey where we focused on making the shopping experience intuitive and visually appealing.
Kotlin's concise syntax allowed us to write clean and efficient code, reducing the complexity of the development process.
Crafting a user-friendly interface for browsing products, managing the shopping cart, and implementing secure user authentication was both challenging and rewarding.
Integrating payment features seamlessly with Kotlin brought convenience and trust to our users, ensuring a smooth shopping journey.
Utilizing Kotlin's versatility, we implemented location-based services to provide users with store-specific information and promotions, enhancing their in-store experience.
Regular user testing and feedback loops played a crucial role in refining our design, resulting in an app that combines functionality to meet the needs of modern shoppers.
Now, with that said, Let's dive into the coding part. Shall we?

User Authentication
Implementing user sign-in and login functionality in the smart shop app was key in personalizing the shopping experience.
We used Kotlin's syntax and Firebase's efficient authentication services to streamline the creation of secure user accounts.
Designing intuitive registration and login screens with Kotlin ensured users could easily create accounts and access their profiles.
Firebase's Authentication service allowed us to implement secure email and password-based authentication effortlessly.
We enriched the user experience by integrating Firebase Authentication's social authentication methods, enabling users to log in with their Google or other social media accounts.
Kotlin's capabilities made incorporating Firebase Authentication's password reset functionality straightforward, simplifying account recovery for forgetful users.
Ensuring user data security was a top priority. Firebase Authentication provides security features, including password hashing and protection against brute-force attacks.
We established a seamless link between Firebase Authentication and our app's user database, ensuring consistent user experiences across devices.
Regularly monitoring Firebase Authentication's analytics helped us gain insights into user behavior and fine-tune the sign-in and login process.
To understand how to use Firebase for authentication purposes, Kindly check out my article on Firebase for more insights.
User Sign-up
For the sign-up, this code made it easy for the user to register as a user and then proceed to the login easily:
import android.content.Intent
import androidx.appcompat.app.AppCompatActivity
import android.os.Bundle
import android.widget.Toast
import com.example.app_smart.databinding.ActivitySignupBinding
import com.google.firebase.auth.FirebaseAuth

class SignupActivity : AppCompatActivity() {
    private lateinit var binding: ActivitySignupBinding
    private lateinit var firebaseAuth: FirebaseAuth
    override fun onCreate(savedInstanceState: Bundle?) {
        super.onCreate(savedInstanceState)
        binding = ActivitySignupBinding.inflate(layoutInflater)
        setContentView(binding.root)
        firebaseAuth = FirebaseAuth.getInstance()
        binding.buttonSign.setOnClickListener{
            val email = binding.emailEt.text.toString()
            val password = binding.passET.text.toString()
            val confirmPassword = binding.confirmPassEt.text.toString()
            if (email.isNotEmpty() && password.isNotEmpty() && confirmPassword.isNotEmpty()){
                if (password == confirmPassword){
                    firebaseAuth.createUserWithEmailAndPassword(email, password).addOnCompleteListener{
                        if (it.isSuccessful){
                            val intent = Intent(this, LoginActivity::class.java)
                            startActivity(intent)
                        } else {
                            Toast.makeText(this, it.exception.toString(), Toast.LENGTH_SHORT).show()
                        }
                    }
                } else {
                    Toast.makeText(this, "Password does not matched", Toast.LENGTH_SHORT).show()
                }
            } else {
                Toast.makeText(this, "Fields cannot be empty", Toast.LENGTH_SHORT).show()
            }
        }
        binding.loginRedirectText.setOnClickListener {
            val loginIntent = Intent(this, LoginActivity::class.java)
            startActivity(loginIntent)
        }
    }
}
Layout Initialization and Firebase Authentication Setup:
The code begins by initializing the layout for the SignupActivity using data binding. This process inflates the associated XML layout file, setting up the user interface for the registration screen.
User Registration Handling:
When the user clicks the "Sign Up" button, the code retrieves the email and password.
Data Validation and Password Matching:
Before initiating the registration process, the code checks for empty email and password fields. This step ensures that users provide the necessary information for registration. It verifies that the entered password matches the confirmed password, enhancing data accuracy and security.
 val email = binding.emailEt.text.toString()
            val password = binding.passET.text.toString()
            val confirmPassword = binding.confirmPassEt.text.toString()
            if (email.isNotEmpty() && password.isNotEmpty() && confirmPassword.isNotEmpty()){
                if (password == confirmPassword){
                    firebaseAuth.createUserWithEmailAndPassword(email, password).addOnCompleteListener{
User Registration with Firebase:
If the data passes the validation checks, the code creates a new user account using Firebase Authentication's createUserWithEmailAndPassword method. This Firebase feature simplifies the process of creating and managing user accounts securely.
Redirection to LoginActivity on Success:
If the user registration is successful, the code redirects to the login activity. This seamless transition allows users to log in immediately after creating their accounts, enhancing their overall experience.
 if (it.isSuccessful){
                            val intent = Intent(this, LoginActivity::class.java)
                            startActivity(intent)
Providing Login Redirection Option:
Users can access the app's login functionality by clicking the "Login". This feature provides users with flexibility and convenience in switching between registration and login processes.
binding.loginRedirectText.setOnClickListener {
            val loginIntent = Intent(this, LoginActivity::class.java)
            startActivity(loginIntent)
User Login
This code allows the user to log in to the mobile app:
import android.content.Intent
import android.graphics.drawable.ColorDrawable
import androidx.appcompat.app.AppCompatActivity
import android.os.Bundle
import android.util.Patterns
import android.widget.Button
import android.widget.EditText
import android.widget.Toast
import androidx.appcompat.app.AlertDialog
import com.example.app_smart.databinding.ActivityLoginBinding
import com.google.firebase.auth.FirebaseAuth

private lateinit var binding: ActivityLoginBinding
    private lateinit var firebaseAuth: FirebaseAuth
    override fun onCreate(savedInstanceState: Bundle?) {
        super.onCreate(savedInstanceState)
        binding = ActivityLoginBinding.inflate(layoutInflater)
        setContentView(binding.root)
        firebaseAuth = FirebaseAuth.getInstance()
        binding.buttonLogin.setOnClickListener {
            val email = binding.emailEt.text.toString()
            val password = binding.passET.text.toString()
            if (email.isNotEmpty() && password.isNotEmpty()){
                firebaseAuth.signInWithEmailAndPassword(email, password).addOnCompleteListener{
                    if (it.isSuccessful){
                        val intent = Intent(this, MainActivity::class.java)
                        startActivity(intent)
                    } else {
                        Toast.makeText(this, it.exception.toString(), Toast.LENGTH_SHORT).show()
                    }
                }
            } else {
                Toast.makeText(this, "Fields cannot be empty", Toast.LENGTH_SHORT).show()
            }
        }
        binding.forgotPass.setOnClickListener {
            val builder = AlertDialog.Builder(this)
            val view = layoutInflater.inflate(R.layout.dialog_forgot, null)
            val userEmail = view.findViewById<EditText>(R.id.editBox)
            builder.setView(view)
            val dialog = builder.create()
            view.findViewById<Button>(R.id.btnReset).setOnClickListener {
                compareEmail(userEmail)
                dialog.dismiss()
            }
            view.findViewById<Button>(R.id.btnCancel).setOnClickListener {
                dialog.dismiss()
            }
            if (dialog.window != null){
                dialog.window!!.setBackgroundDrawable(ColorDrawable(0))
            }
            dialog.show()
        }
        binding.signupRedirectText.setOnClickListener {
            val signupIntent = Intent(this, SignupActivity::class.java)
            startActivity(signupIntent)
        }
    }
    //Outside onCreate
    private fun compareEmail(email: EditText){
        if (email.text.toString().isEmpty()){
            return
        }
        if (!Patterns.EMAIL_ADDRESS.matcher(email.text.toString()).matches()){
            return
        }
        firebaseAuth.sendPasswordResetEmail(email.text.toString())
            .addOnCompleteListener { task ->
                if (task.isSuccessful) {
                    Toast.makeText(this, "Check your email", Toast.LENGTH_SHORT).show()
                }
            }
    }
User Input Collection upon "Login" Button Tap:
When the user clicks the "Login" button, the code gathers the email and password provided by the user.
Firebase Authentication for User Login:
It uses Firebase Authentication, logging the user in with the entered email and password. Successful login leads to the main app screen, while failed attempts display error messages.
binding.buttonLogin.setOnClickListener {
            val email = binding.emailEt.text.toString()
            val password = binding.passET.text.toString()
            if (email.isNotEmpty() && password.isNotEmpty()){
                firebaseAuth.signInWithEmailAndPassword(email, password).addOnCompleteListener{
                    if (it.isSuccessful){
                        val intent = Intent(this, MainActivity::class.java)
                        startActivity(intent)
Forgotten Password Handling with "Forgot Password?" Option:
Users who forget their passwords can click "Forgot Password?" to request a password reset via email, ensuring account access is maintained. Email validation and confirmation are built-in for added security.
binding.forgotPass.setOnClickListener {
            val builder = AlertDialog.Builder(this)
            val view = layoutInflater.inflate(R.layout.dialog_forgot, null)
            val userEmail = view.findViewById<EditText>(R.id.editBox)
            builder.setView(view)
            val dialog = builder.create()
            view.findViewById<Button>(R.id.btnReset).setOnClickListener {
                compareEmail(userEmail)
                dialog.dismiss()
            }
            view.findViewById<Button>(R.id.btnCancel).setOnClickListener {
                dialog.dismiss()
            }
            if (dialog.window != null){
                dialog.window!!.setBackgroundDrawable(ColorDrawable(0))
            }
            dialog.show()
        }
        binding.signupRedirectText.setOnClickListener {
            val signupIntent = Intent(this, SignupActivity::class.java)
            startActivity(signupIntent)
        }
    }
App's Functionality
Smart Phone's Camera Activation:
Camera Provider Initialization:
We first initialized the camera setup by obtaining a ProcessCameraProvider instance. This provider is essential for managing camera-related operations, including camera configuration and binding.
 private fun startCamera() {
        val cameraProviderFuture = ProcessCameraProvider.getInstance(requireContext())
        cameraProviderFuture.addListener({
            val cameraProvider: ProcessCameraProvider = cameraProviderFuture.get()
Listener for Camera Provider Future:
A listener is established to await the completion of the cameraProviderFuture. This approach ensures that the camera provider is ready before proceeding with camera configuration, preventing potential timing issues.
val cameraProvider: ProcessCameraProvider = cameraProviderFuture.get()
Camera Configuration:
In this part, the code begins configuring the camera by creating instances of Preview and ImageAnalysis. These components are crucial for live camera preview and real-time image analysis, respectively.
 val preview = Preview.Builder().build().also {
                it.setSurfaceProvider(previewView.surfaceProvider)
Preview Configuration:
The Preview object was then configured to display the live camera feed on the designated preview view. This setup establishes a seamless connection between the camera and the view, enabling users to see what the camera captures in real time.
Then, the code extracts essential information about the image, such as its rotation degrees, and prepares it for analysis using the processImage function.
Lastly, the code selects the default back camera and binds it to the app's lifecycle, including the preview and imageAnalysis components. Additionally, error handling is implemented to capture and log any potential errors that may arise during the camera setup process, ensuring a smooth user experience.
  val imageAnalysis = ImageAnalysis.Builder()
                .build()
                .also {
                    it.setAnalyzer(cameraExecutor) { imageProxy ->
                        val rotationDegrees = imageProxy.imageInfo.rotationDegrees
                        val mediaImage = imageProxy.image
                        val image = mediaImage?.let { InputImage.fromMediaImage(it, rotationDegrees) }
                        if (image != null) {
                            processImage(image)
                        }
                    }
                }

            val cameraSelector = CameraSelector.DEFAULT_BACK_CAMERA

            try {
                cameraProvider.unbindAll()
                cameraProvider.bindToLifecycle(
                    viewLifecycleOwner, cameraSelector, preview, imageAnalysis
                )
            } catch (ex: Exception) {
                Log.e(TAG, "Error: ${ex.message}")
            }
        }, ContextCompat.getMainExecutor(requireContext()))
    }
Barcode Scanning and Processing:
For the Barcode processing the code takes an InputImage as input, representing a camera-captured image, and processes it for barcodes using Firebase's Barcode Scanner.
It goes through the list of detected barcodes, extracting their raw values, which contain encoded data.
For each barcode, it checks if the barcode's value is not null and proceeds to interact with the Firebase Realtime Database.
The code queries the "products" node within the database using the barcode value and checks if the data exists.
If data exists, it retrieves product details like name, price, and image URL from the database's response and displays them.
private fun processImage(image: InputImage) {
        barcodeScanner.process(image)
            .addOnSuccessListener { barcodes ->
                for (barcode in barcodes) {
                    val barcodeValue = barcode.rawValue

                    if (barcodeValue != null) {
                        barcodeTextView.text = "Barcode number is: $barcodeValue"
                        database = Firebase.database.reference
                        val productsReference = database.child("products")

                        productsReference.child(barcodeValue).get().addOnSuccessListener { dataSnapshot ->
                            if (dataSnapshot.exists()) {
                                val name = dataSnapshot.child("name").value.toString()
                                val price = dataSnapshot.child("price").value.toString().toDouble()
                                val imageUrl = dataSnapshot.child("imageUrl").value.toString()
                                val mappedProduct = Product(name, price, barcodeValue, imageUrl)
                                displayProductInfo(mappedProduct, barcodeValue)

                                Log.i("firebase", "Got value $mappedProduct")
                            } else {
                                // Handle the case when barcode is not found in the database
                                barcodeTextView.text = "Product with barcode $barcodeValue not found in database."
                            }
                        }
                            .addOnFailureListener {
                                Log.e("firebase", "Error getting data", it)
                            }
                    } else {
                        // Handle the case when barcodeValue is null
                        barcodeTextView.text = "Barcode not detected"
                    }
                }
            }
            .addOnFailureListener { exception ->
                Log.e(TAG, "Barcode scanning failed: ${exception.message}")
            }
    }
Add to cart Functionality:
For this part, we used the SharedViewModel to facilitate communication and data sharing between different parts of the app.
import androidx.lifecycle.LiveData
import androidx.lifecycle.MutableLiveData
import androidx.lifecycle.ViewModel

class SharedViewModel : ViewModel() {
    private val _selectedCartItems = MutableLiveData<List<Scan.CartItem>>()
    val selectedCartItem: LiveData<List<Scan.CartItem>> = _selectedCartItems

    init {
        // Initialize the LiveData with an empty list.
        _selectedCartItems.value = emptyList()
    }

    fun addToCart(cartItem: Scan.CartItem) {
        // Retrieve the current list of selected cart items.
        val currentItems = _selectedCartItems.value ?: emptyList()

        // Create a new list with the newly scanned item added.
        val newItems = currentItems.toMutableList()
        newItems.add(cartItem)

        // Update the LiveData with the new list.
        _selectedCartItems.value = newItems
    }
}
SharedViewModel extends ViewModel for data sharing.
"**selectedCartItems" is a private MutableLiveData storing cart items.
"selectedCartItem" is a public LiveData for observing cart items.
The "Constructor" initializes selectedCartItems with an empty list.
"addToCart" adds items to the cart and updates" _selectedCartItems".
"selectedCartItem" updates UI components, such as an adapter class, allowing them to display and reflect changes in the cart items in the app's user interface.
Payment Functionality:
For the payment option, we used the Daraja API for Mpesa services. This allows the user to pay for the scanned products in the shopping store.
// Initialize Daraja API
val daraja = Daraja.Builder(
    "YOUR_CONSUMER_KEY",
    "YOUR_CONSUMER_SECRET",
    Env.SANDBOX //
).build()

// Create a Payment Request
val paymentRequest = LNMExpress(
    BusinessShortCode = "YOUR_SHORTCODE",
    PassKey = "YOUR_PASSKEY",
    Amount = "100", // Amount to be paid
    PartyA = "YOUR_PHONE_NUMBER", // Customer's phone number
    PartyB = "YOUR_SHORTCODE",
    PhoneNumber = "YOUR_PHONE_NUMBER",
    CallBackURL = "YOUR_CALLBACK_URL",
    AccountReference = "YOUR_REFERENCE",
    TransactionDesc = "Payment for Order #123"
)

// Initiate Payment
daraja.initiatePayment(paymentRequest) { result ->
    if (result is STKPushSuccess) {
        // Payment initiation was successful
        val paymentDetails = result.paymentDetails
        // Handle the payment details as needed
    } else if (result is STKPushError) {
        // Payment initiation encountered an error
        val errorMessage = result.errorMessage
        // Handle the error message appropriately
    }
}
Daraja API Initialization:
The code initializes the Daraja API using your consumer key and secret. You specify whether you're operating in the sandbox (testing) or production environment.
Payment Request Creation:
A payment request (LNMExpress) is created with various parameters such as the business shortcode, passkey, payment amount, customer's phone number, callback URL, account reference, and transaction description.
Initiate Payment:
The daraja.initiatePayment method is called to initiate the payment. It takes the payment request as a parameter and provides a callback with the payment result.
Payment Success Handling:
If the payment initiation is successful (STKPushSuccess), the code can access the payment details and proceed accordingly, such as updating the order status in your app.
Payment Error Handling:
In case of an error during payment initiation (STKPushError), the code can retrieve the error message and handle it, which may involve informing the user or retrying the payment.
Conclusion
The Smart Shopping App combines user-friendly features to enhance the shopping experience. With the power of Kotlin programming, it enables users to scan product barcodes, retrieve real-time information from a Firebase database, and add items to their cart seamlessly. The shared view model ensures data consistency across the app, allowing users to manage their shopping selections effortlessly.
Furthermore, the integration of the Daraja API brings the convenience of mobile payments, particularly M-Pesa services, into the app. This addition expands the app's functionality, making it a comprehensive tool for both shopping and secure payment transactions.
Overall, the Smart Shopping App showcases the potential of mobile app development, utilizing Kotlin, Firebase, and third-party APIs to create a user-centric solution that facilitates the shopping process.
Thank you, for making it this far!!
Remember to share and like this article!!